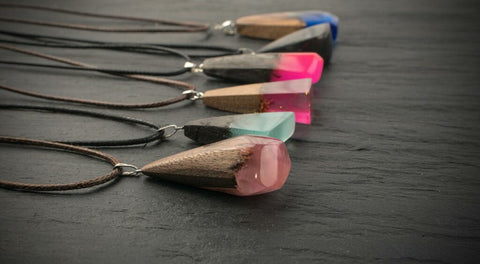
River tables are the new interior trend taking Australia by storm.
In this guide, we’re going to show you how to make an epoxy resin river table step by step. Follow the stages and you’ll be rewarded with a unique piece of furniture that is as beautiful as it is practical.
What is a river table?
Sometimes referred to as an epoxy resin table, a river table is made by decanting a “river” of epoxy between two pieces of wood within a special frame or mould.
The look of the epoxy resin combined with the uneven turned-inwards edges of wood creates the look of a river running through the timber.
You can use blue epoxy resin to resemble water or use a clear resin and embed objects like shells for unique effects.
Your handmade epoxy resin table will be both a talking point and a source of pride every time you look at it!
What you need to create a river table
Let’s take a look at the materials and equipment you need to create a unique and beautiful river table.
- Two wooden boards of equal length and dimensions to suit the size of table you want to create
- MDF wood to create a mould
- Electric sander
- Sandpaper
- Release agent
- Clamps
- Safety glasses
- Face mask
- Gloves
- Ultra Clear Epoxy Resin Part A — Note that the best river table epoxy resin does not yellow when dry, is water-resistant and has strong adhesion qualities.
- Epoxy Hardener Clearpox Part B
- Measuring cup
- Plastic stirrer
- Colour pigment if desired
- Wood oil (for example linseed oil) or clear resin to finish the table
- Table legs
- Heat gun or hair dryer to remove bubbles
To make life easy, why not grab an Ultra Clear Epoxy Resin Kit? Including epoxy resin, epoxy hardener, measuring cup and stirrer, it’s the convenient way to create your one-of-a-kind river table.
What type of wood should I choose?
When it comes to selecting your wooden boards, you will first need to decide whether to go for a natural look or to purchase ordinary wooden boards from a DIY store.
Many people love the naturally imperfect look of river tables, so if you can find wooden boards that still retain that natural look, so much the better. Jarrah, Tasmanian oak and ironbark all make good choices.
Or if you are using ordinary wooden boards, you can cut them with a jigsaw on one side to mimic the curves and undulations of a river.
Creating a river table step by step
Let’s get down to business and start making your river table!
Step 1: Prepare your working conditions
The ideal workspace will have a minimum temperature of 20° Celsius. You will find your epoxy resin works better at this temperature.
You will also need to ensure that your work area is free of dust, dry and well ventilated.
Step 2: Prime your wood
Remove any bark that remains on your wood as the epoxy resin will not bond successfully with it. Then smooth down the edges with sandpaper.
Use an electric sander to sand the large surfaces of the wood, removing dust as you go.
Finish the sides manually with sandpaper.
Use a vacuum cleaner to clean the wood of dust and give the wood a final wipe with a soft cloth.
Step 3: Fill in any gaps and seal the wood
Now fill in any holes, gaps or cracks in the wood with clear epoxy resin. Once it’s dry, use the same type of resin to seal the entire surface of the wood. Leave to dry for at least five hours at a temperature between 18° to 24° Celsius.
Once the wood is dry, you will need to rough up the inner edges with sandpaper to prime it for further work.
Step 4: Create a mould for the table
Now it’s time to create a mould to hold the components of your table. You can use MDF boards for this, made up of a bottom panel and two side panels. Join the pieces together with screws or glue.
Seal the edges with silicone and make sure that the table is a snug fit to prevent epoxy resin from leaking when it comes to pouring it in.
You will also need to apply a release agent to the mould so that the epoxy resin doesn’t stick to the MDF boards. You can use silicone spray or liquid release wax for this task.
Step 5: Place the wood in the mould
Ensure that your working surface is level and place your wood carefully into the mould. Lay it out as you would like it to look when the table is finished and use clamps to secure it.
Use silicone on the inner edges to prevent epoxy resin from spreading out of the gutter area that will form your river.
Step 6: Mix your epoxy resin
Calculate the correct amount of resin for your table.
Put on safety glasses, face mask and gloves, and mix up the epoxy resin according to the instructions on the packaging.
After mixing, you may notice air bubbles in the epoxy resin. These can be dissipated with a hot air dryer. Go gently and only use as much heat as you need.
Step 7: Add colour to the epoxy resin
If you want to colour your resin, now is the time to add the pigment.
To create a water effect, divide the resin into two buckets. Use a blue pearl powder pigment to colour one part of the resin, then for the rest, use a matt blue pigment.
Step 8: Pour the resin into the mould
Pour the first layer of resin from the two separate buckets into the mould one after the other.
Make swirling, circular movements to create a pattern like flowing water.
You will need to wait until this first layer is not completely dry but slightly sticky before pouring the second layer.
If you are using a clear epoxy resin and want to embed objects such as shells, you can add them now.
Step 9: Remove from the mould
Once the resin is completely dry, you can remove the table from the mould. Remove any clamps and carefully use a chisel and hammer (a plastic one is preferred) to prise the tabletop out.
Buff away any resin on the wood with sandpaper.
For a matt finish, apply wood oil. Or for a glossy look, apply clear resin.
Step 10: Attach the legs
The final step is to attach the table legs, and voilà, you have a brand-new and unique piece of furniture!
Find river table epoxy resin in Australia
If you’re looking for quality river table epoxy resin, choose Clearpox Ultra Clear Premium Epoxy Resin. It’s easy to use, comes with a 100% guarantee and we offer free shipping throughout Australia on all orders over $40.
Order now and take the first step towards your unique and beautiful epoxy resin river table!


