Skip to content

Clearpox Ultra Clear Epoxy Resin: Pro Tips, Common Mistakes, and How to Get a Flawless Finish
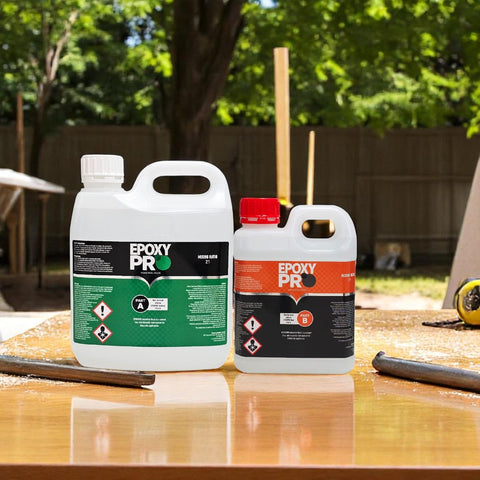
Achieving a flawless finish with epoxy resin can elevate your project—whether you're a weekend hobbyist or a seasoned professional. Clearpox Ultra Clear is your go-to 2:1 epoxy resin for unmatched clarity and a smooth, durable finish.
Whether you’re creating a resin artwork, building a river table, or sealing timber, mastering the basics—mixing, pouring, and thinning—is essential. This guide walks you through it all, helping you avoid common mistakes and get the best results possible. For a quick visual guide on common epoxy resin mistakes to avoid, check out this helpful resource.
Mastering the 2:1 Mixing Ratio
Getting the mixing ratio right is crucial for achieving the perfect epoxy resin finish. Let's dive into some expert tips and common pitfalls to avoid when working with Clearpox Ultra Clear's 2:1 ratio. Here is a short video with tips on mastering the 2:1 mixing ratio.
Resin Mixing Tips for Success
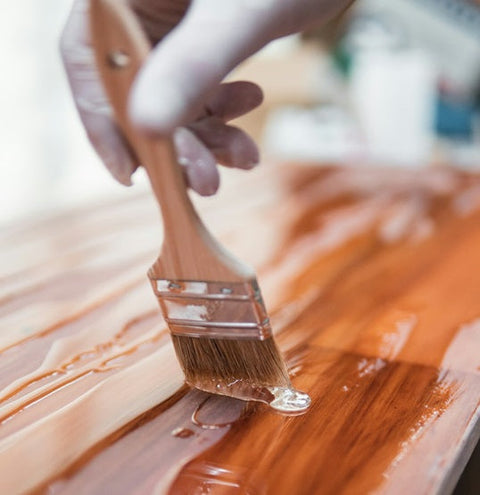
The key to a successful epoxy resin project lies in precise mixing. Start by measuring your resin and hardener accurately using clean, dry containers. A digital scale is your best friend here.
For Clearpox Ultra Clear, remember the golden rule: two parts resin to one part hardener. This ratio is critical for proper curing and achieving that crystal-clear finish we all love.
Mix thoroughly but gently to avoid introducing air bubbles. This video demonstrates the mixing technique. Scrape the sides and bottom of your mixing container to ensure all components are well combined.
Pro tip: Mix in a warm environment (around 21-25°C) for optimal viscosity and working time. Check out this comprehensive guide for more mixing tips.

Common Epoxy Resin Mistakes
Even seasoned pros can stumble when working with epoxy resin. Here are some common mistakes to watch out for:
-
Eyeballing measurements: This is a recipe for disaster. Always measure precisely.
-
Undermixing: Insufficient mixing leads to soft spots and tacky areas. Aim for a thorough 3-5 minute mix.
-
Overworking the mix: Excessive stirring can introduce too many air bubbles. Find the right balance.
Temperature mishaps can also wreak havoc on your project. Working in conditions that are too cold or too hot can affect curing times and final results.
Lastly, don't forget about proper surface preparation. Neglecting this step can lead to adhesion issues and an imperfect finish. This video offers great insights on avoiding common mistakes.
Achieving the Perfect Pour
Pouring your epoxy resin correctly is an art form. Let's explore the ideal pour depth and how to thin your resin for optimal results.
Recommended Resin Pour Depth
Understanding the right pour depth is crucial for achieving a flawless finish with Clearpox Ultra Clear. The maximum recommended pour depth is 20mm per layer.
For thicker pours, it's best to work in multiple layers. This approach helps prevent overheating during the curing process and ensures a crystal-clear result.
When pouring, use a slow, steady motion to minimize air bubbles. Start from one corner and let the resin naturally spread across the surface.
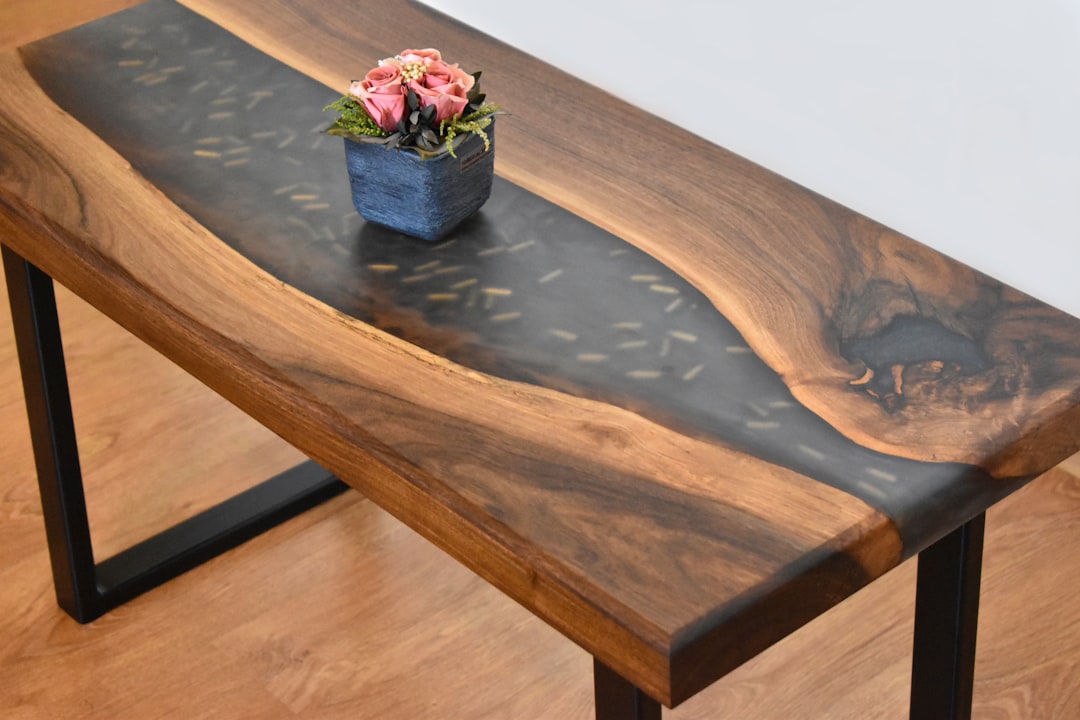
For intricate projects like river tables, consider using a step-by-step pouring technique to achieve depth and dimension.
Remember, patience is key. Allow each layer to cure completely before adding the next for the best results.
How to Thin Epoxy Resin
Sometimes, you might need to thin your epoxy resin for specific applications. Clearpox Ultra Clear can be thinned using benzyl alcohol, but proceed with caution.
Adding benzyl alcohol can:
-
Reduce viscosity for easier pouring
-
Help with bubble release
-
Extend working time slightly
However, be aware that thinning may:
-
Affect the final hardness
-
Increase curing time
-
Potentially impact clarity in large quantities
To thin your resin:
-
Start with a small amount (1-2% by weight)
-
Mix thoroughly before adding more
-
Never exceed 5% by weight
Always test on a small area first to ensure the desired results.
Ensuring a Flawless Finish
The final steps in your epoxy resin project can make or break the outcome. Let's explore some expert tips for curing and troubleshooting common issues.
Resin Curing Tips and Tricks
Proper curing is essential for a durable, glossy finish. Clearpox Ultra Clear typically cures in 24-48 hours, but several factors can influence this process.
Temperature plays a crucial role:
-
Ideal curing temperature: 21-25°C
-
Too cold: Slows curing, may result in a tacky surface
-
Too hot: Can cause overheating and yellowing
Humidity also affects curing:
-
High humidity can lead to cloudiness or surface imperfections
-
Use a dehumidifier in damp environments for best results
For optimal curing:
-
Ensure good ventilation
-
Keep dust and debris away from the curing area
-
Allow full cure time before handling or applying additional layers
Check out this FAQ for more curing insights.
Fixing Resin Bubbling Issues
Bubbles can be the bane of any resin project, but fear not! There are several effective ways to combat this common issue.
Prevention is key:
-
Mix slowly and thoroughly to minimize air introduction
-
Pour in a thin, steady stream to reduce trapped air
-
Work in a warm environment to lower resin viscosity
If bubbles do appear:
-
Gently exhale over the surface (CO2 helps bubbles rise)
-
For stubborn bubbles, use a toothpick to guide them to the surface
"Patience and the right techniques can transform a bubble-ridden pour into a glass-like finish." - Experienced resin artist
For deep pours, consider using a vacuum chamber to remove air before pouring. This professional technique can yield stunning results.
Remember, practice makes perfect. Each project is an opportunity to refine your skills and create something truly spectacular. Explore our range of Clearpox Ultra Clear kits to start your next masterpiece!